How I Turn Framer Designs into Clean Running Code Using Google Antigravity CLI
I used to spend days rebuilding my web designs into clean code. Now I turn visual layouts into fully working frontend code using Framer and Antigravity CLI powered by Gemini Flash.
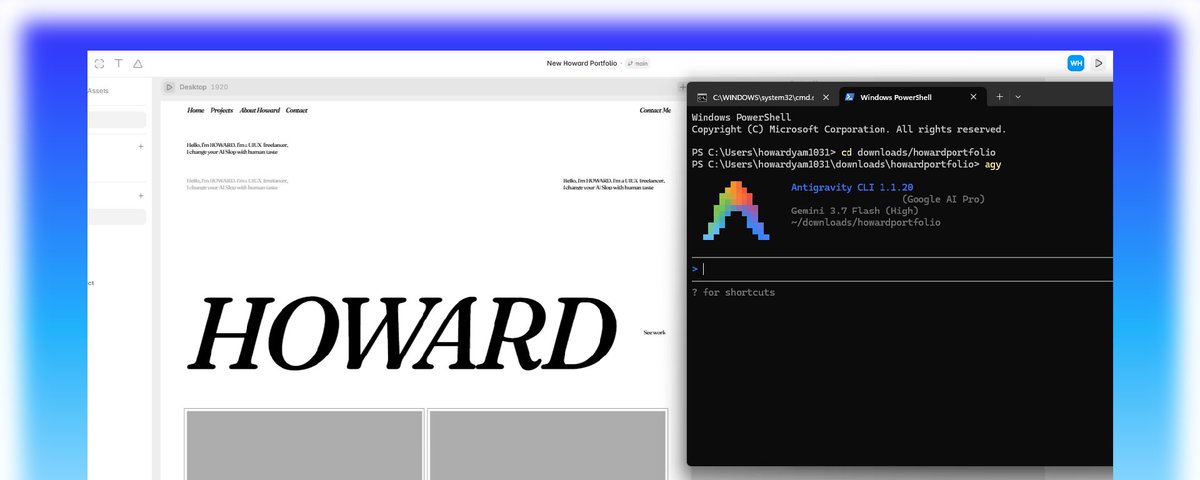
Overview and Context
I used to spend days rebuilding my web designs into clean code. Now I turn visual layouts into fully working frontend applications using Framer and Google Antigravity CLI powered by the Gemini Flash model.
Before diving into the steps, here is why I chose Antigravity CLI over Claude Code or Codex. I have used Claude Code, Codex, and Antigravity CLI before for terminal coding. Claude Code and Codex are great tools for building heavy enterprise web apps like CRM or ERP systems. But Claude Code is expensive with tight rate limits, and Codex fast mode burns through tokens very quickly.
For my workflow of designing in Framer and building clean landing pages and web apps, Antigravity CLI with Gemini Flash is fast, handles the full layout smoothly, and does not burn through token limits. That comes directly from my experience while building my portfolio revamp.
Step-by-Step Workflow
Installing Antigravity CLI and setting up Gemini Flash
I started by getting the AI coding agent running directly inside my local terminal. If you have never run developer tools on your computer before, you will need to install Node.js first. Think of Node.js as the engine that allows your computer to run modern web tools and download packages like Antigravity CLI.
- Open your terminal and install the CLI globally: npm install -g @google/antigravity-cli
- Run agy in your project folder to initialize the workspace
- Open model settings and select Gemini Flash as your default model for fast generation and instant response times
npm install -g @google/antigravity-cli
agy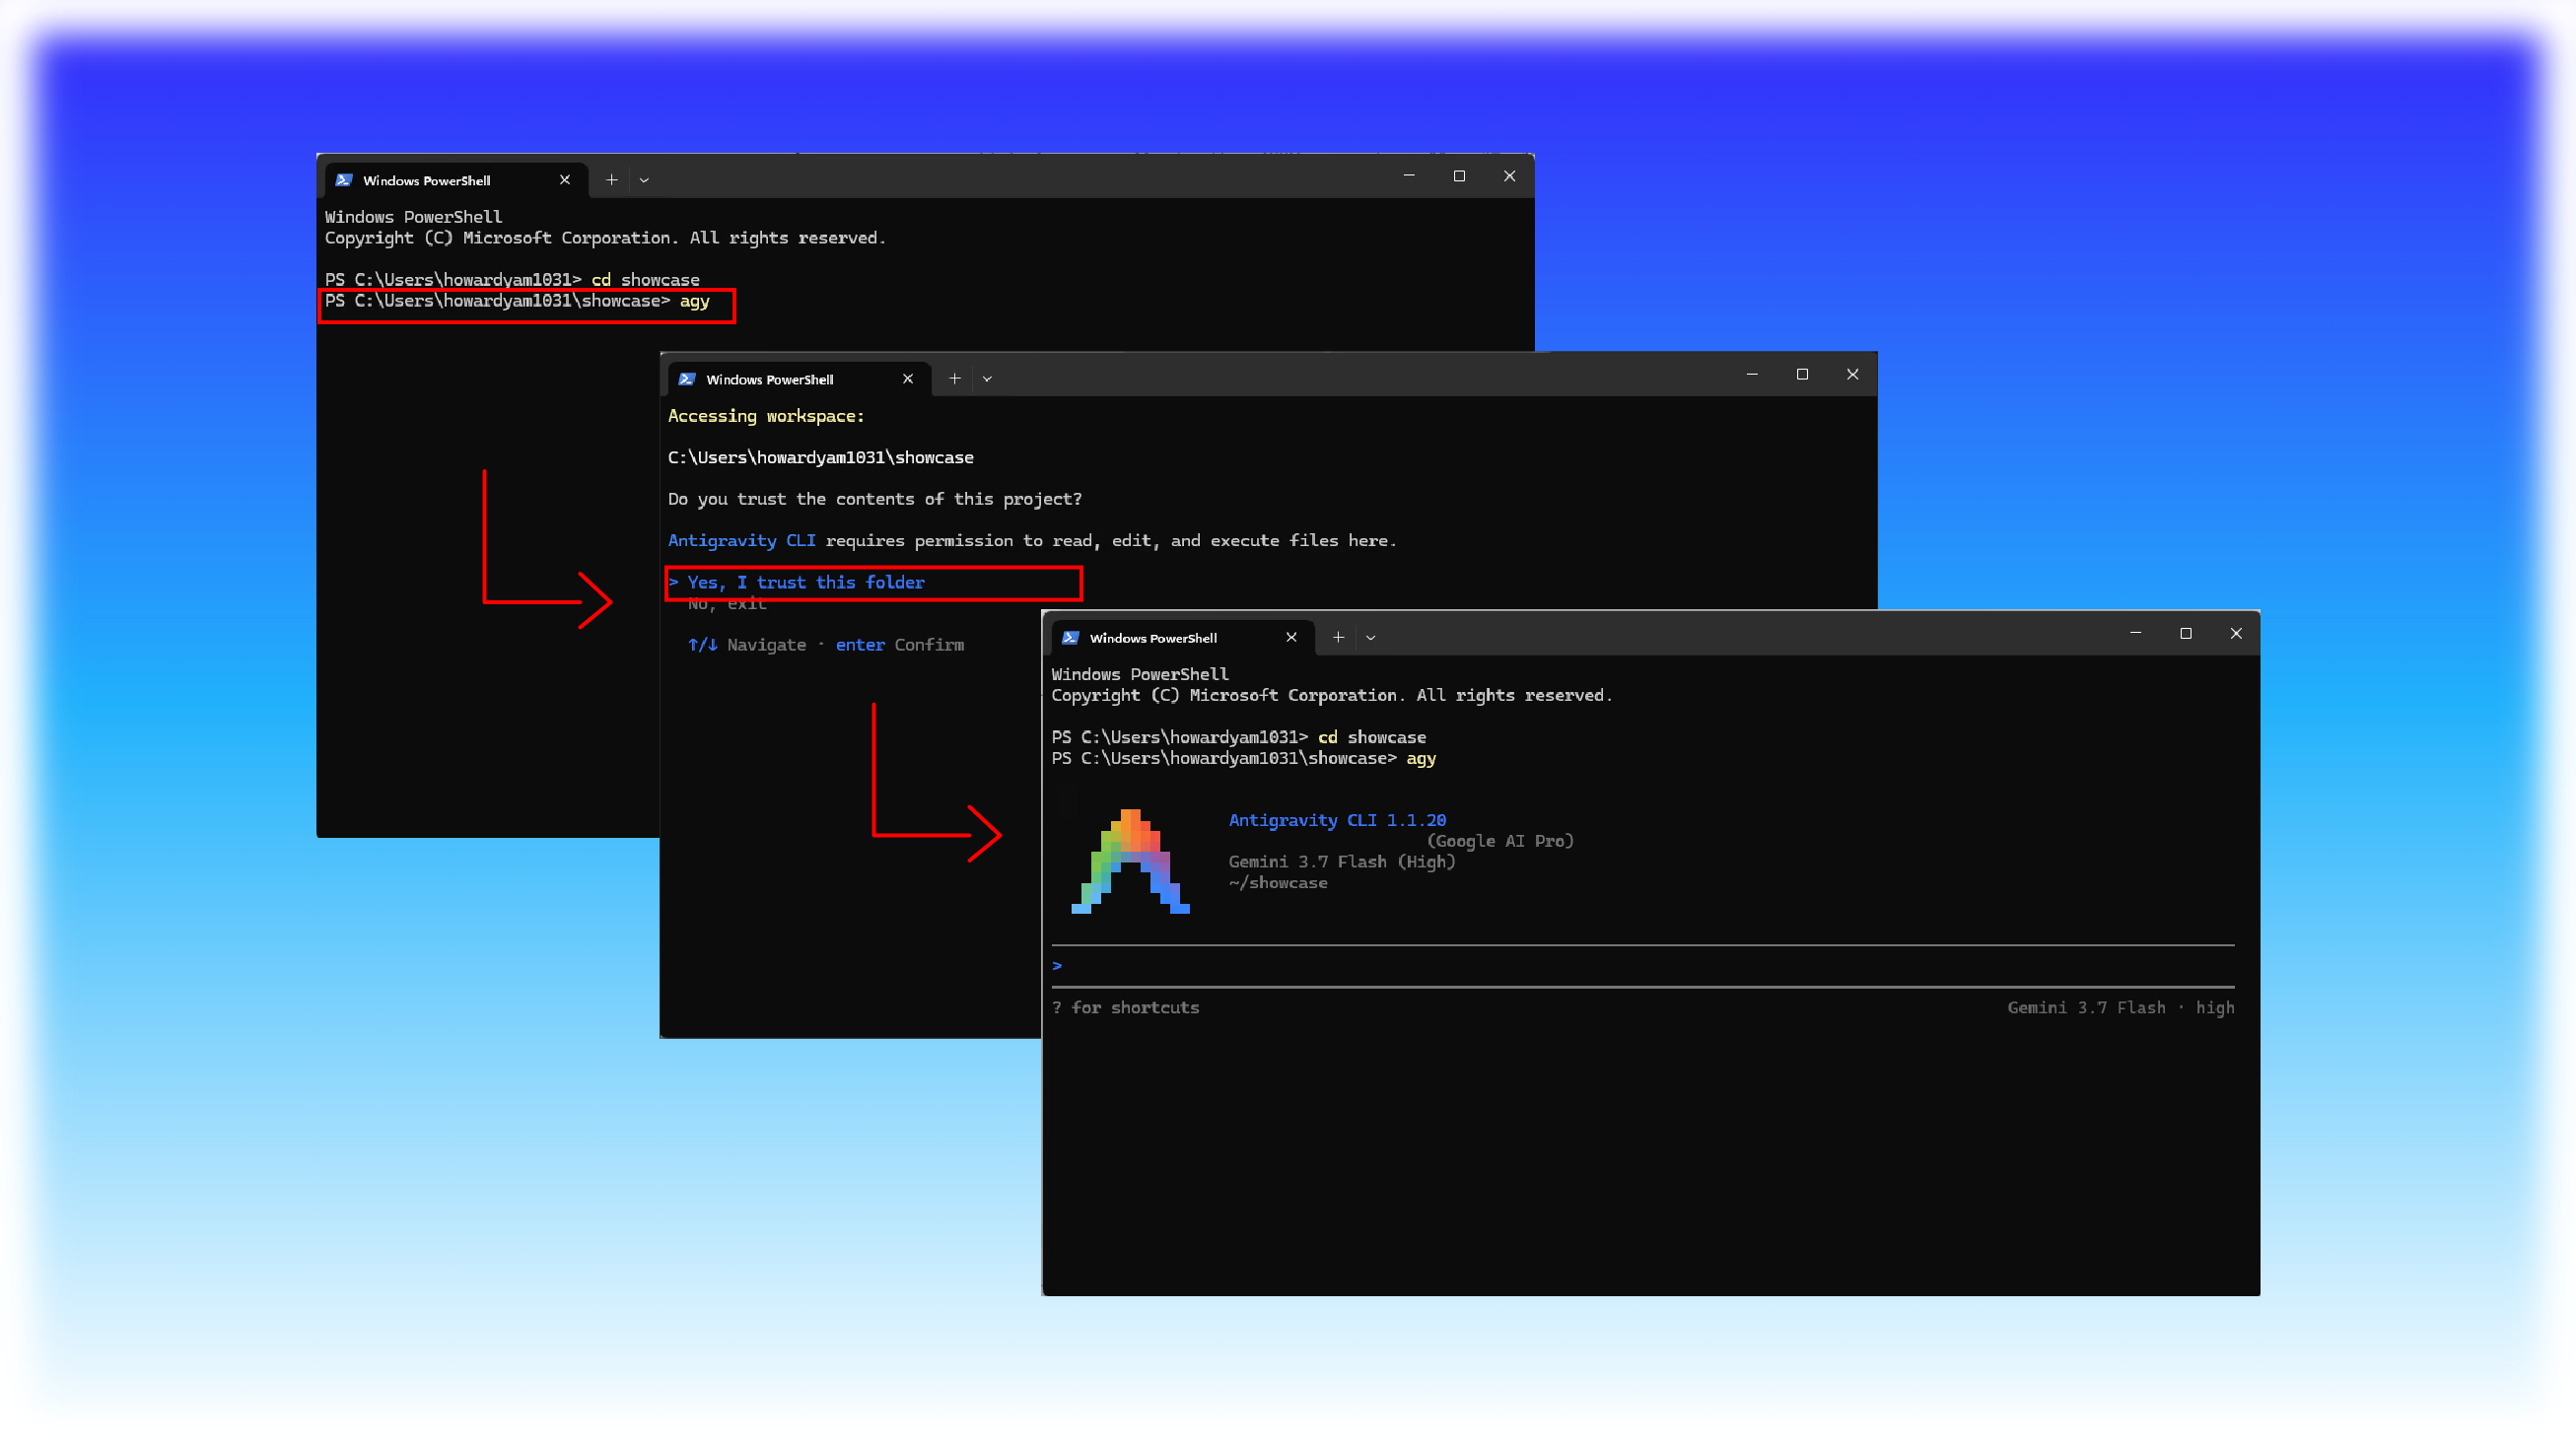
Designing the interface visually in Framer
Next, I created the design manually in Framer. I focused purely on the visual layout without worrying about writing frontend code by hand during the exploration phase.
Getting the Framer API token and setting up environment variables
To let Antigravity read my design data on Framer, I connected my Framer workspace to my machine using the Framer API.
- Log into your Framer dashboard and click on Canvas dropdown in the top left
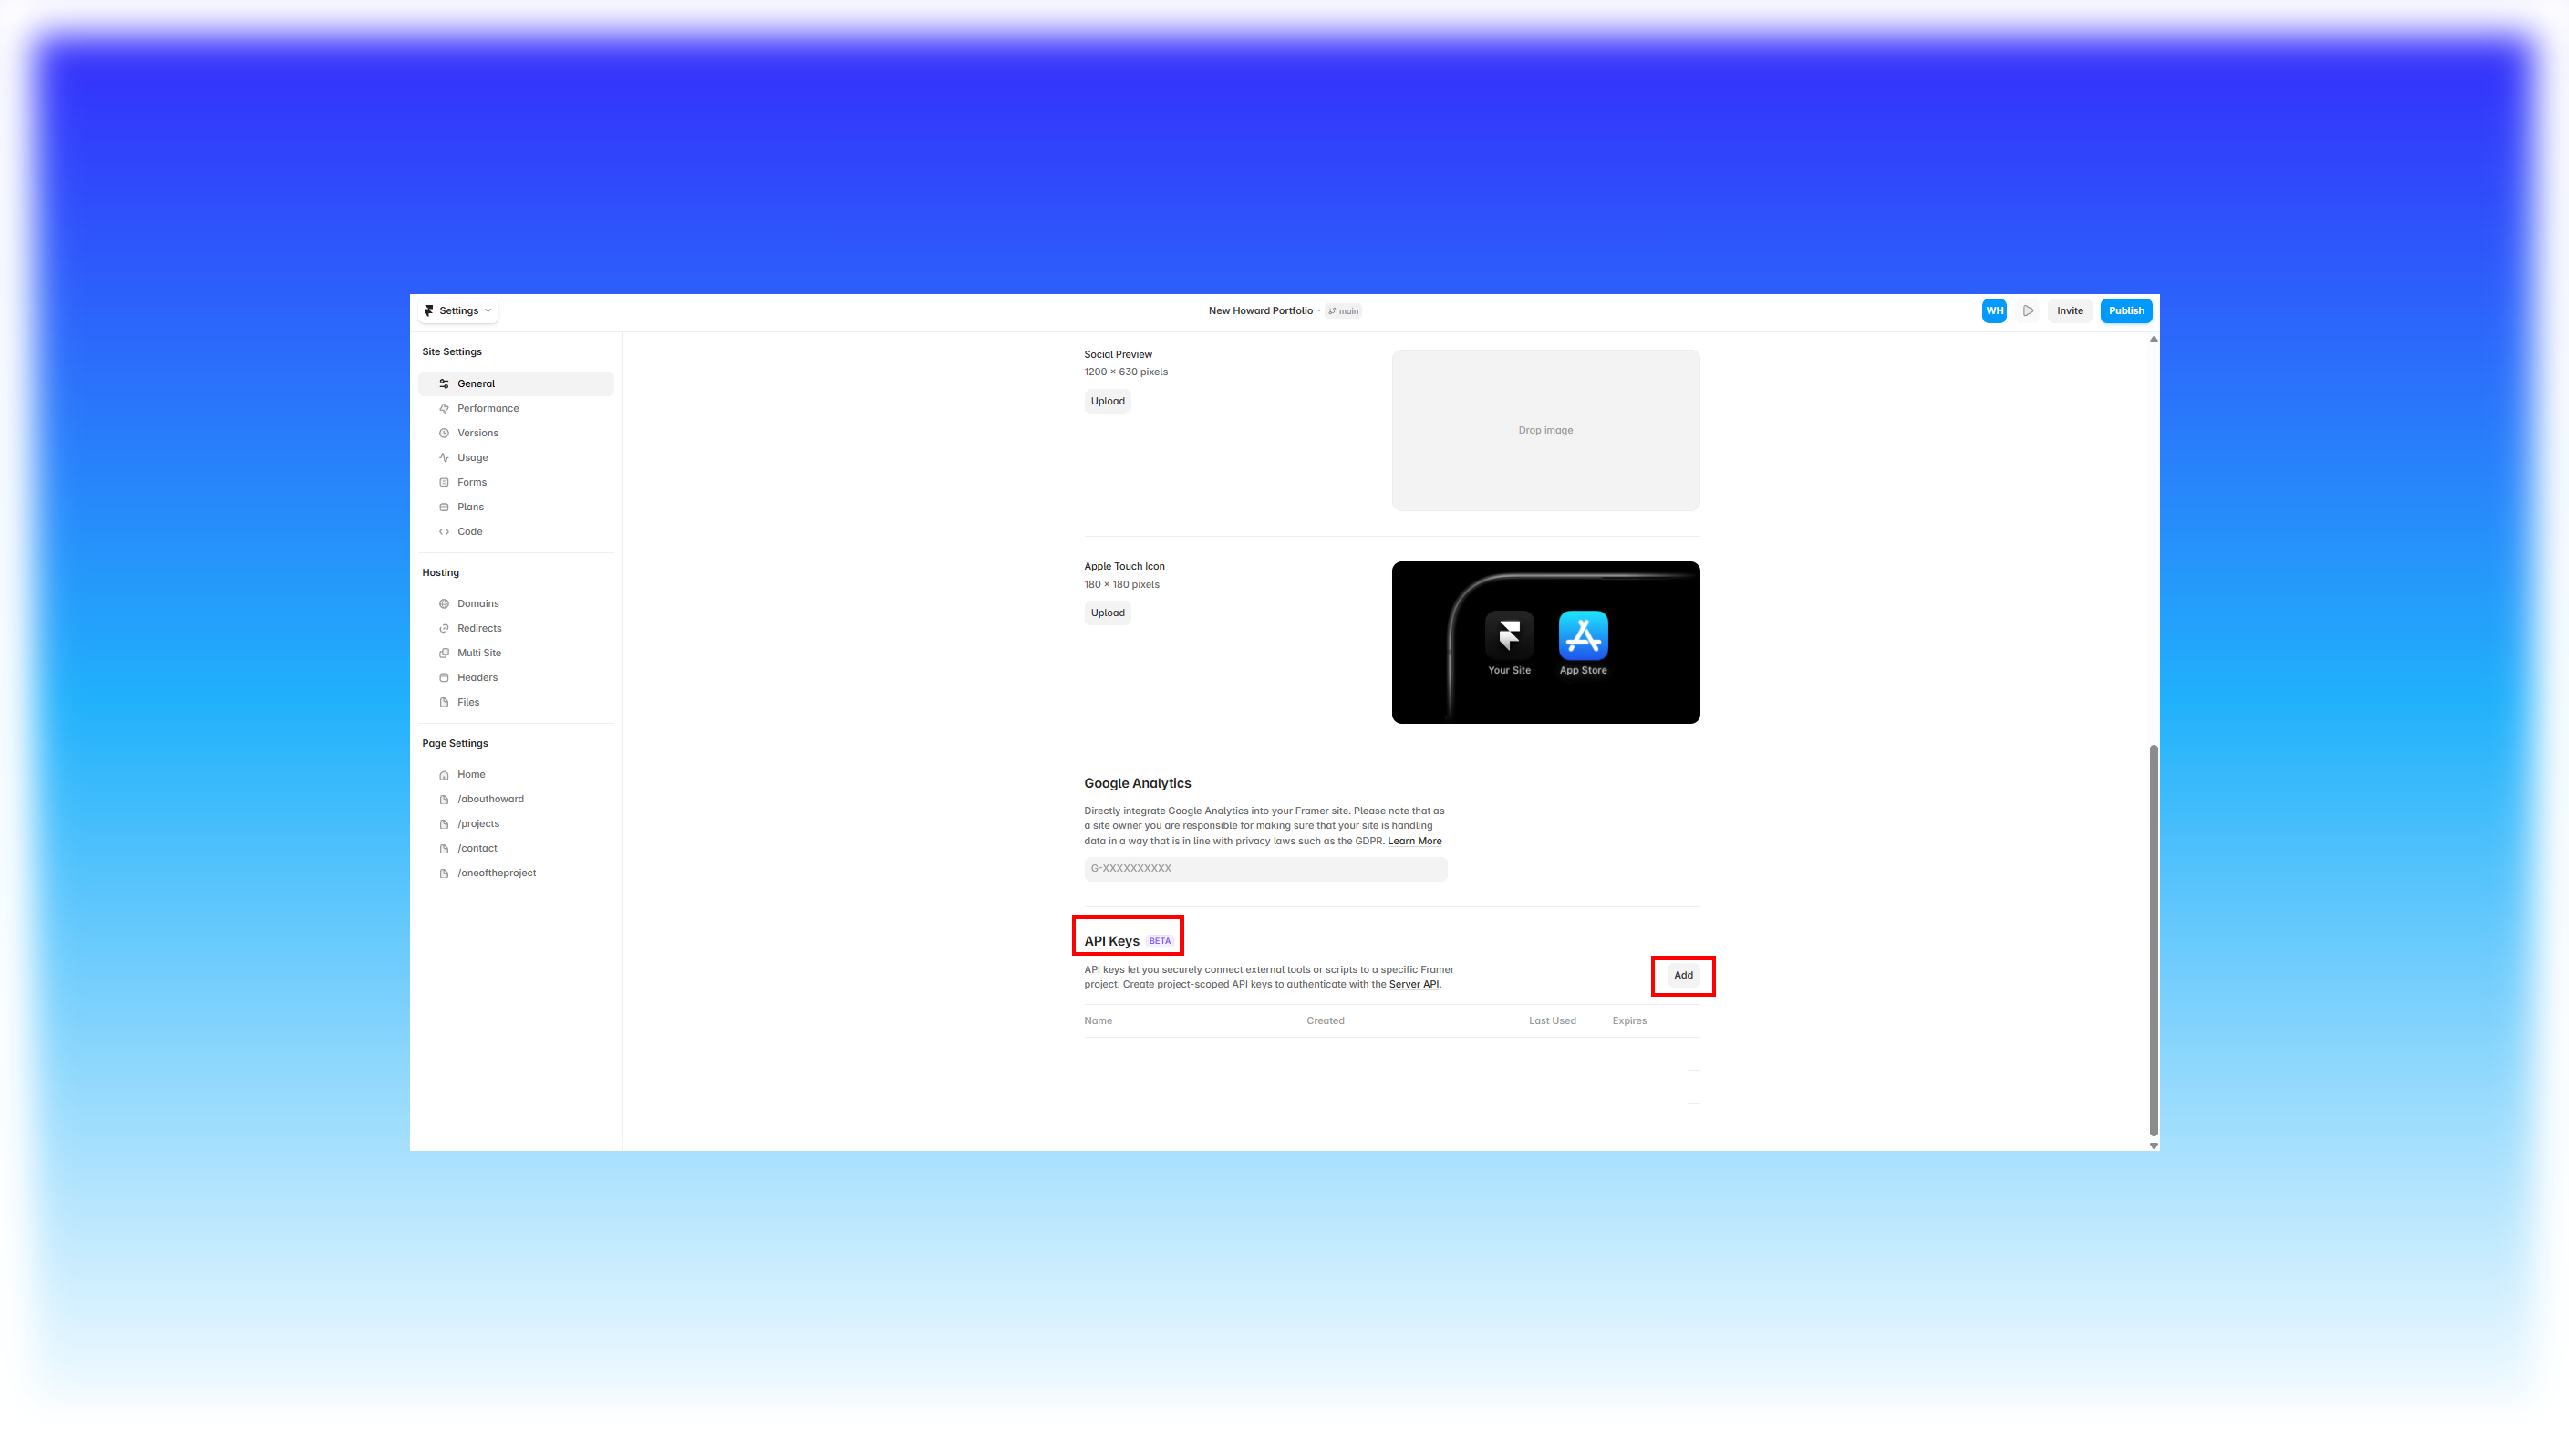
- Go to Settings and scroll down to the API Keys (Beta) section
- Click Add to generate your new project API token and copy the secret key
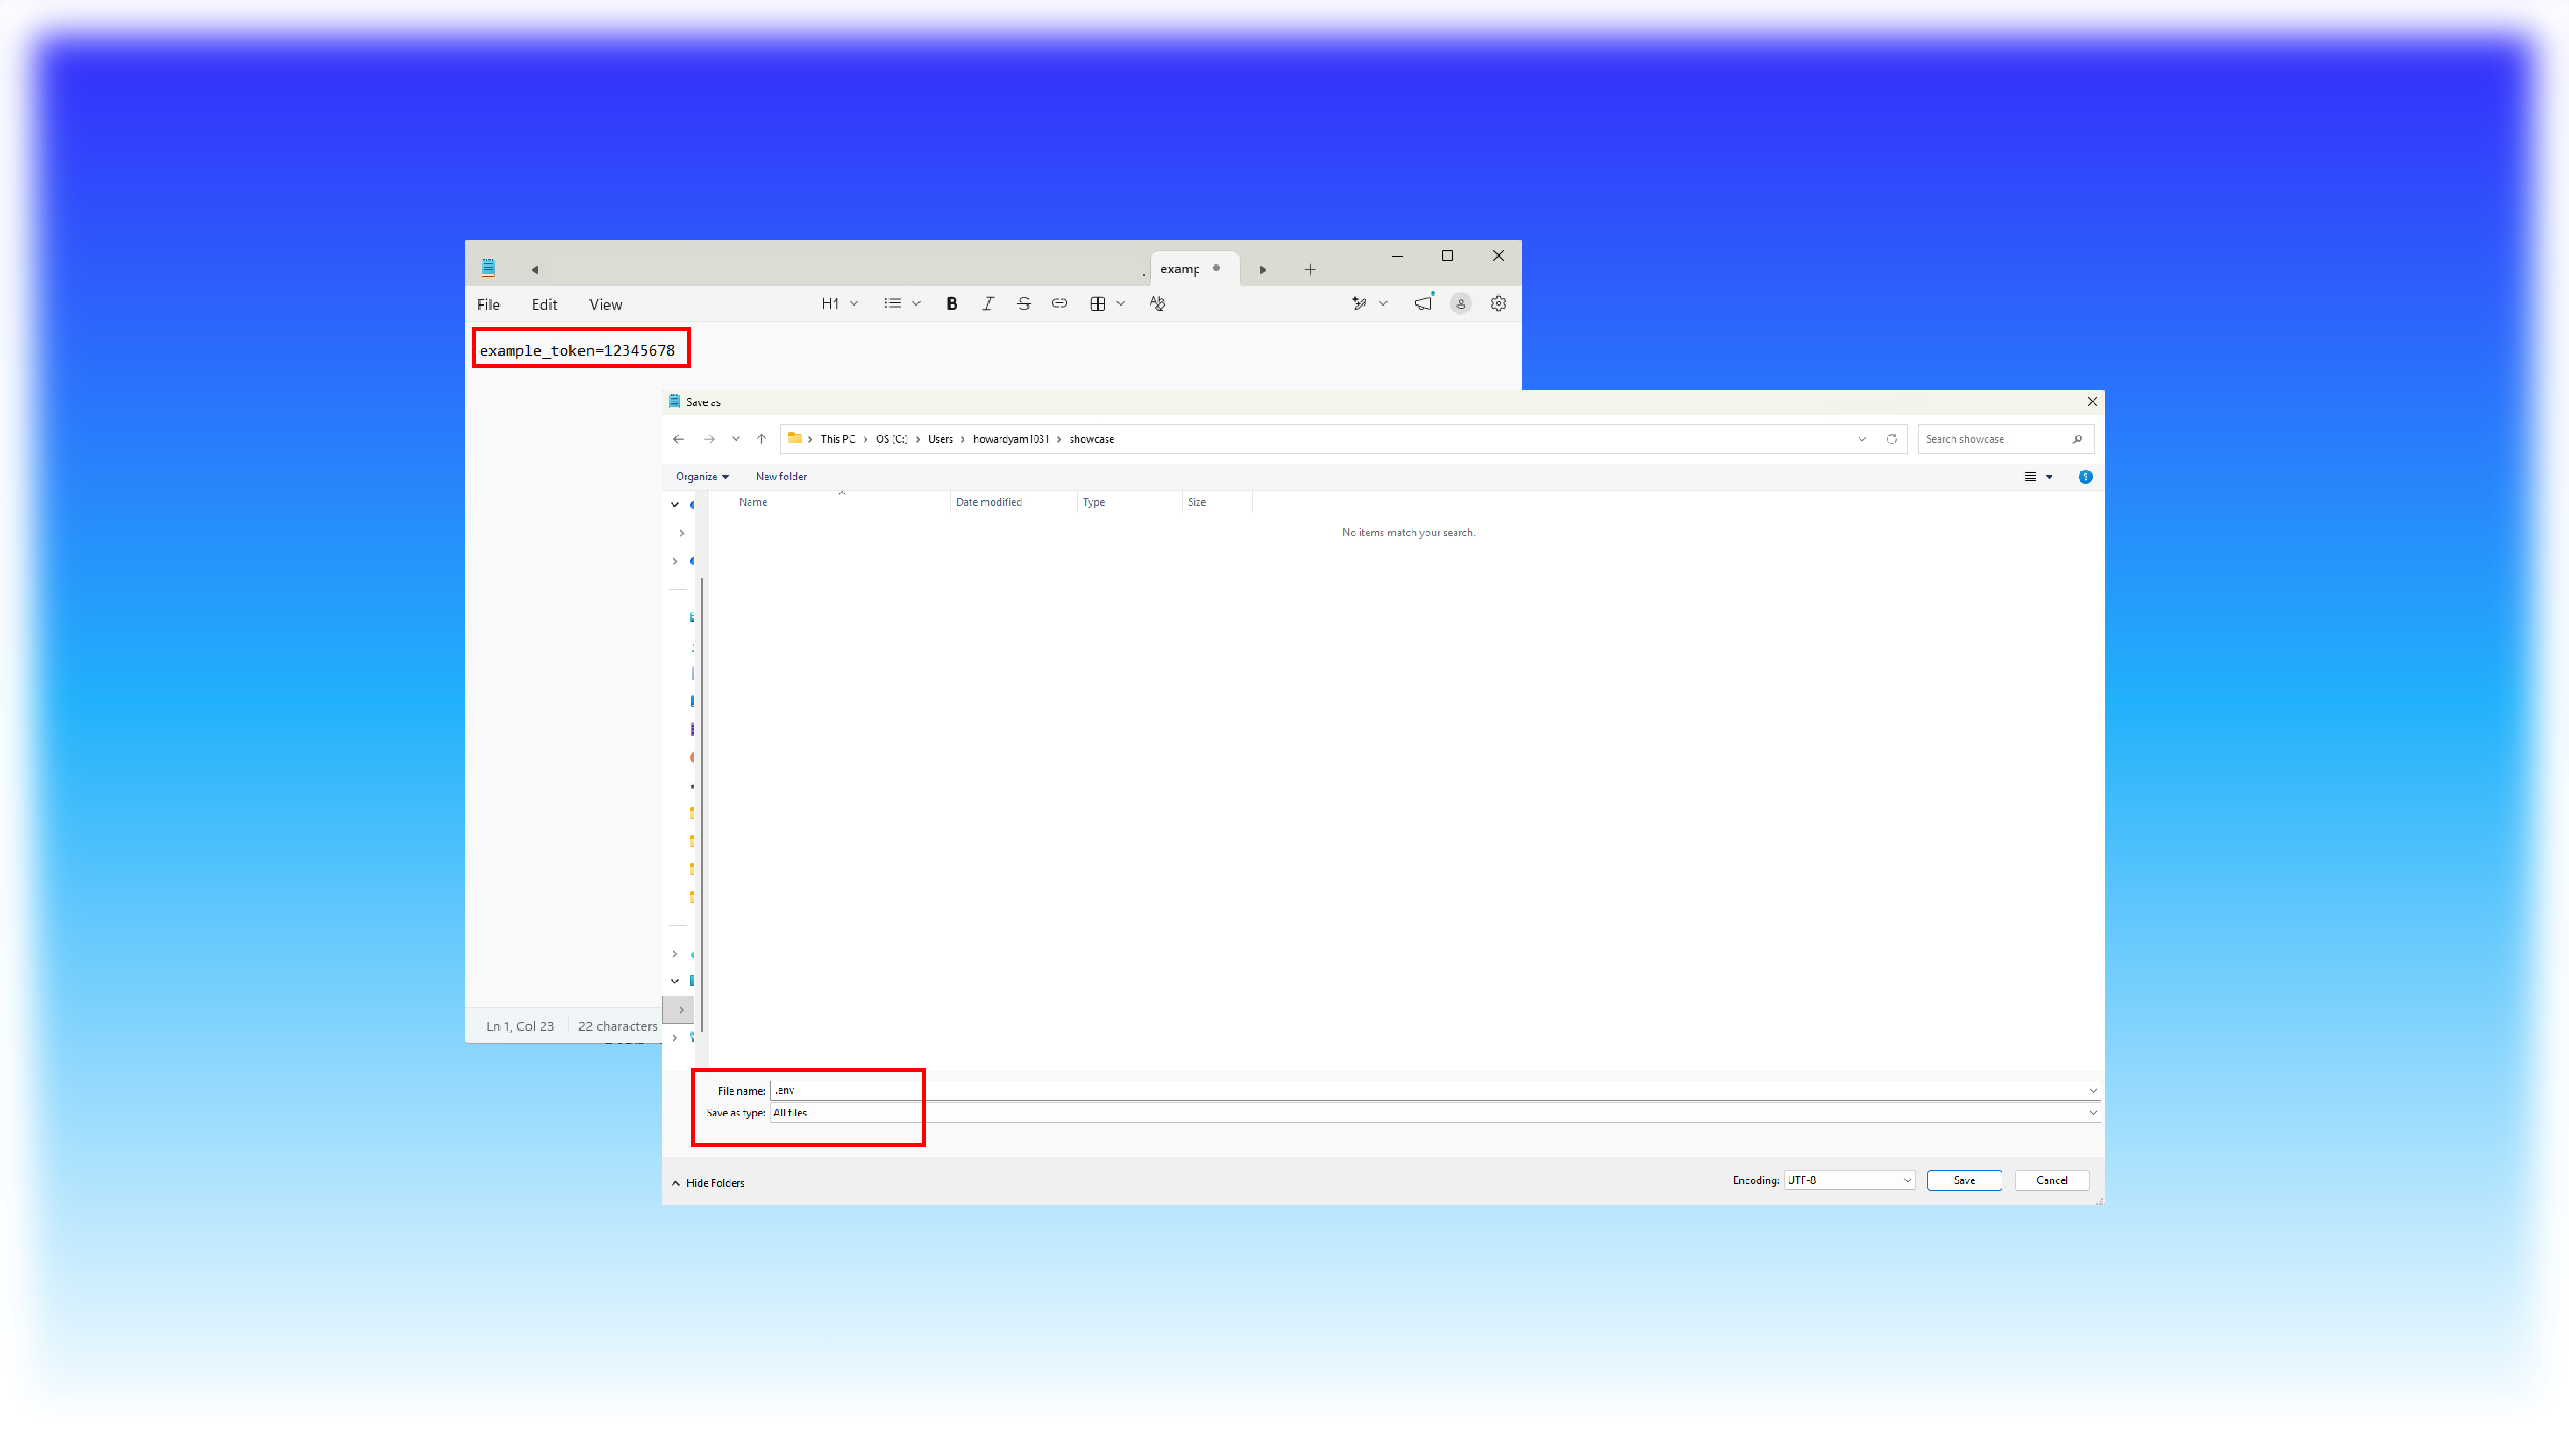
- In your local project directory, create a .env file and paste your credentials, for example framer_api=YOUR_API_KEY
- Save the file as .env with All Types selected
FRAMER_API_TOKEN=your_framer_secret_api_key_here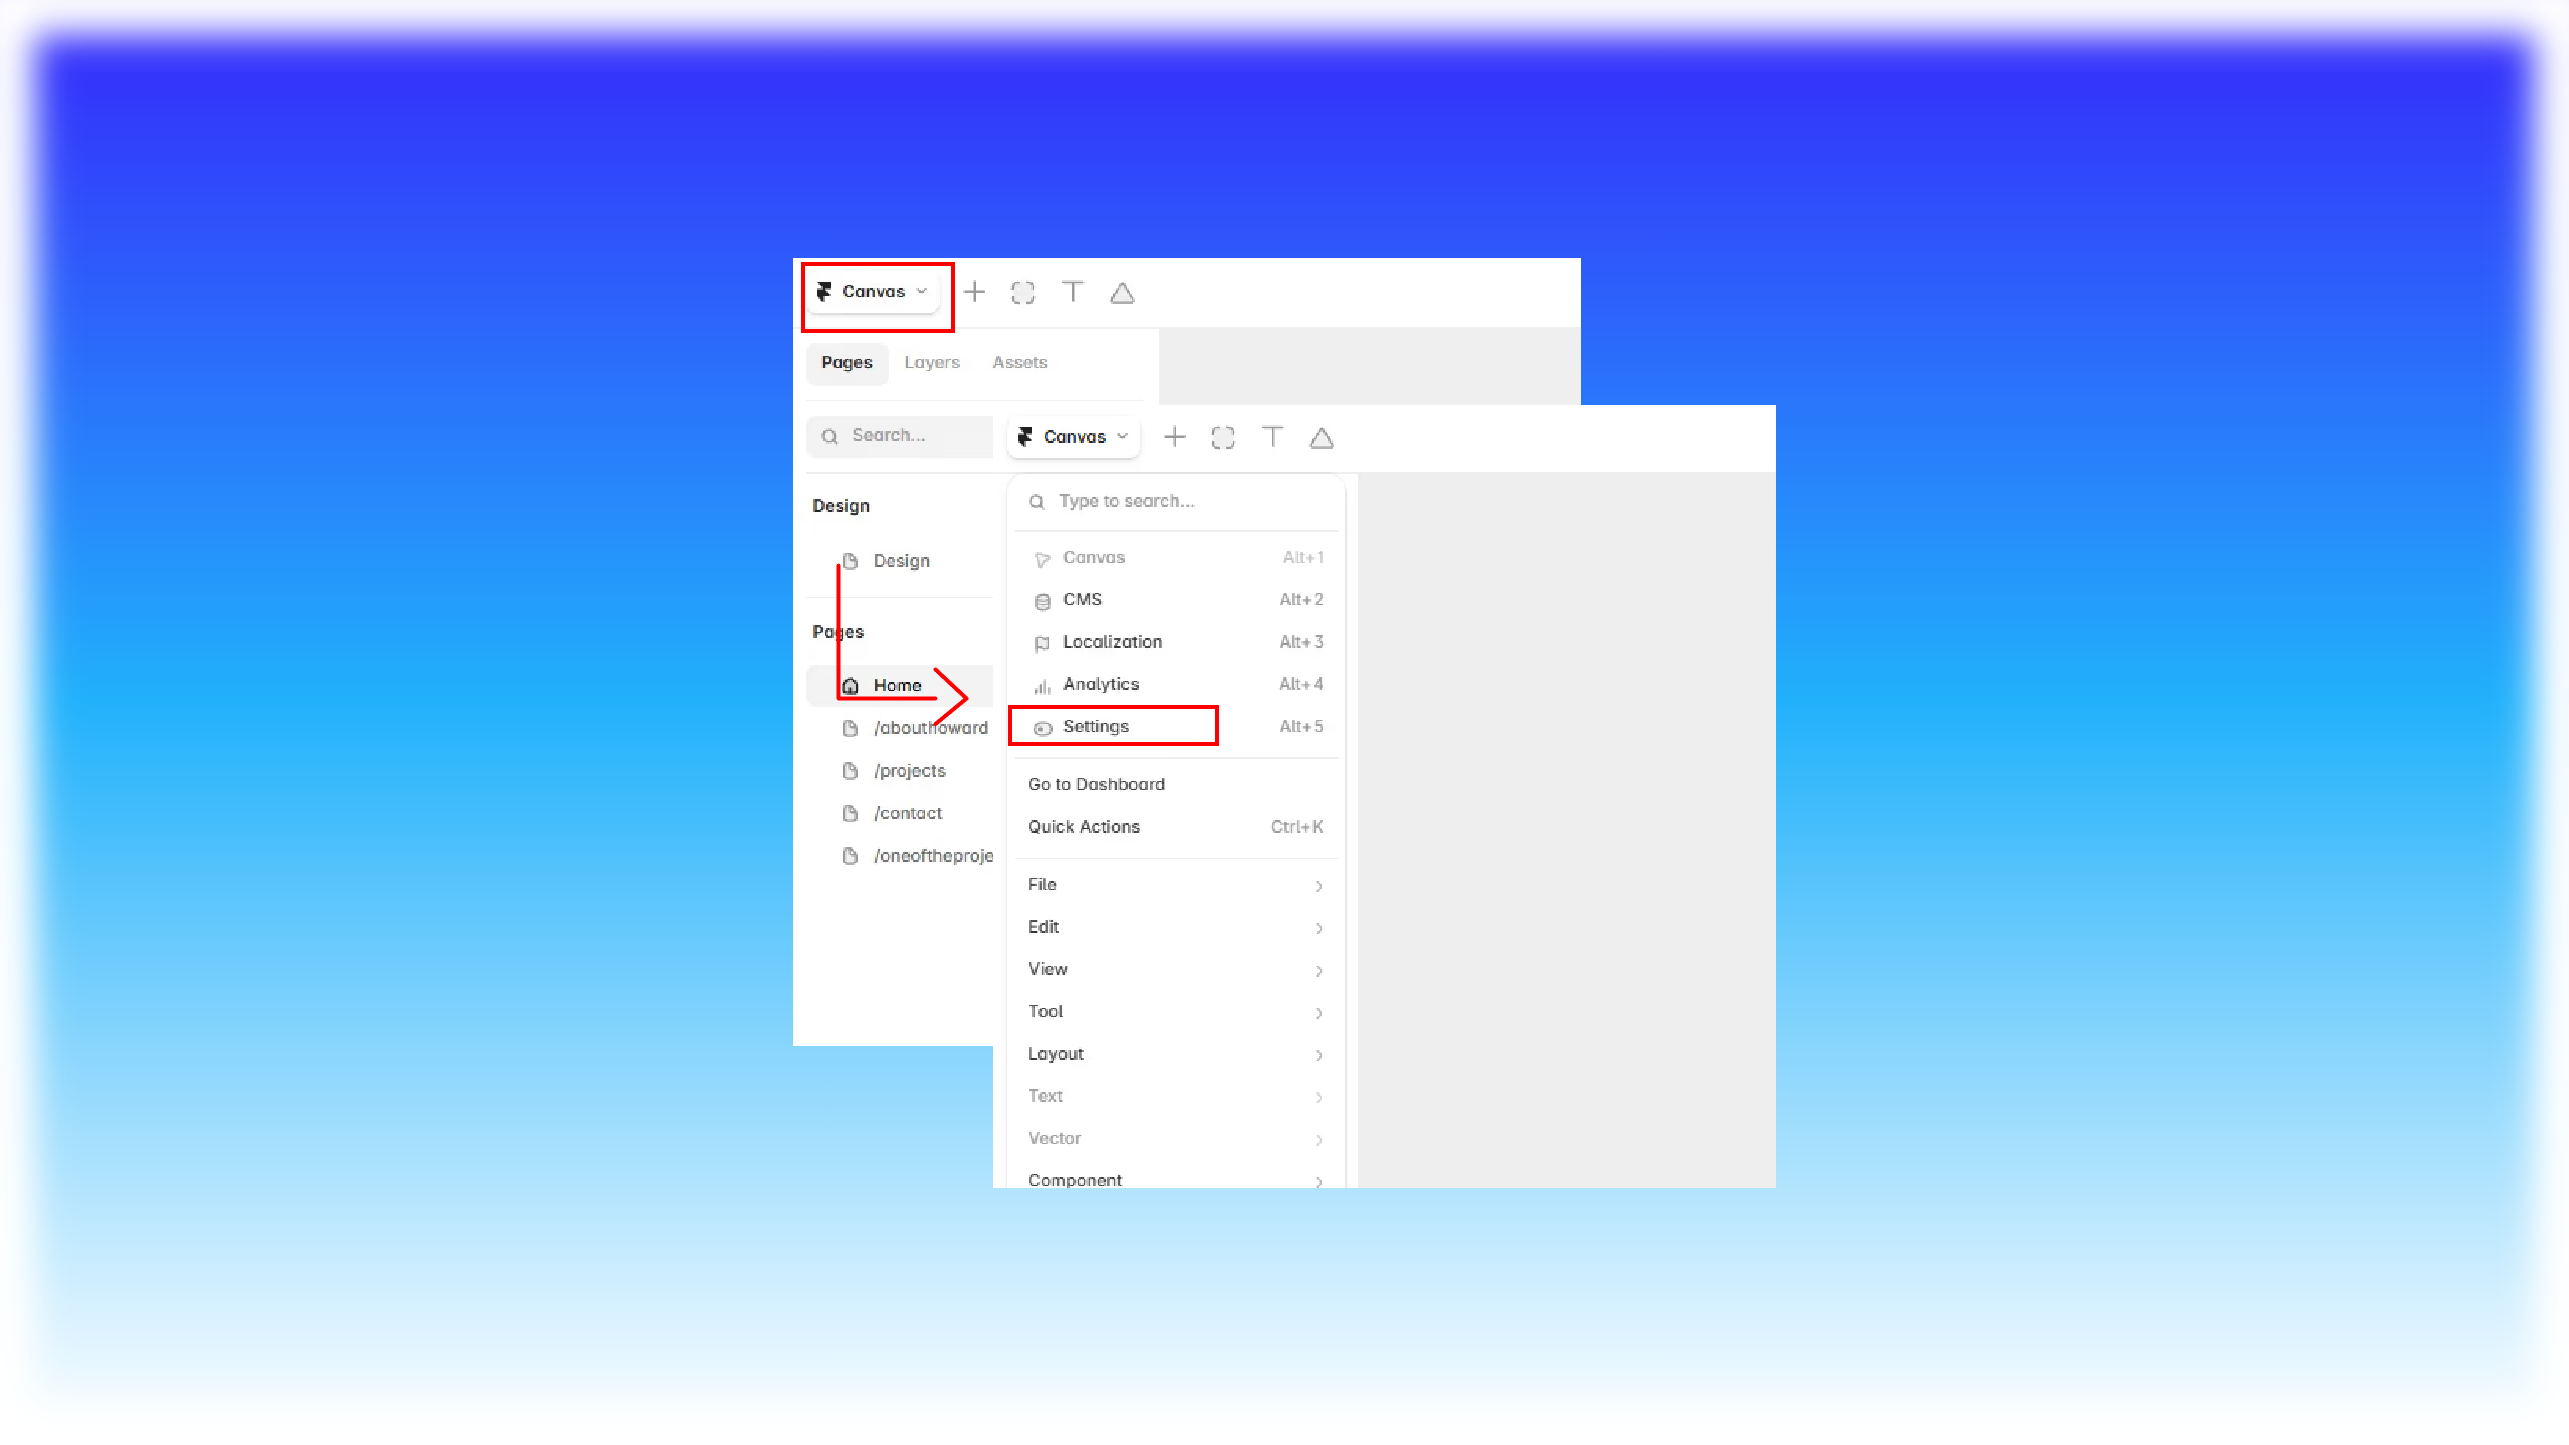
Planning the project architecture with Antigravity CLI
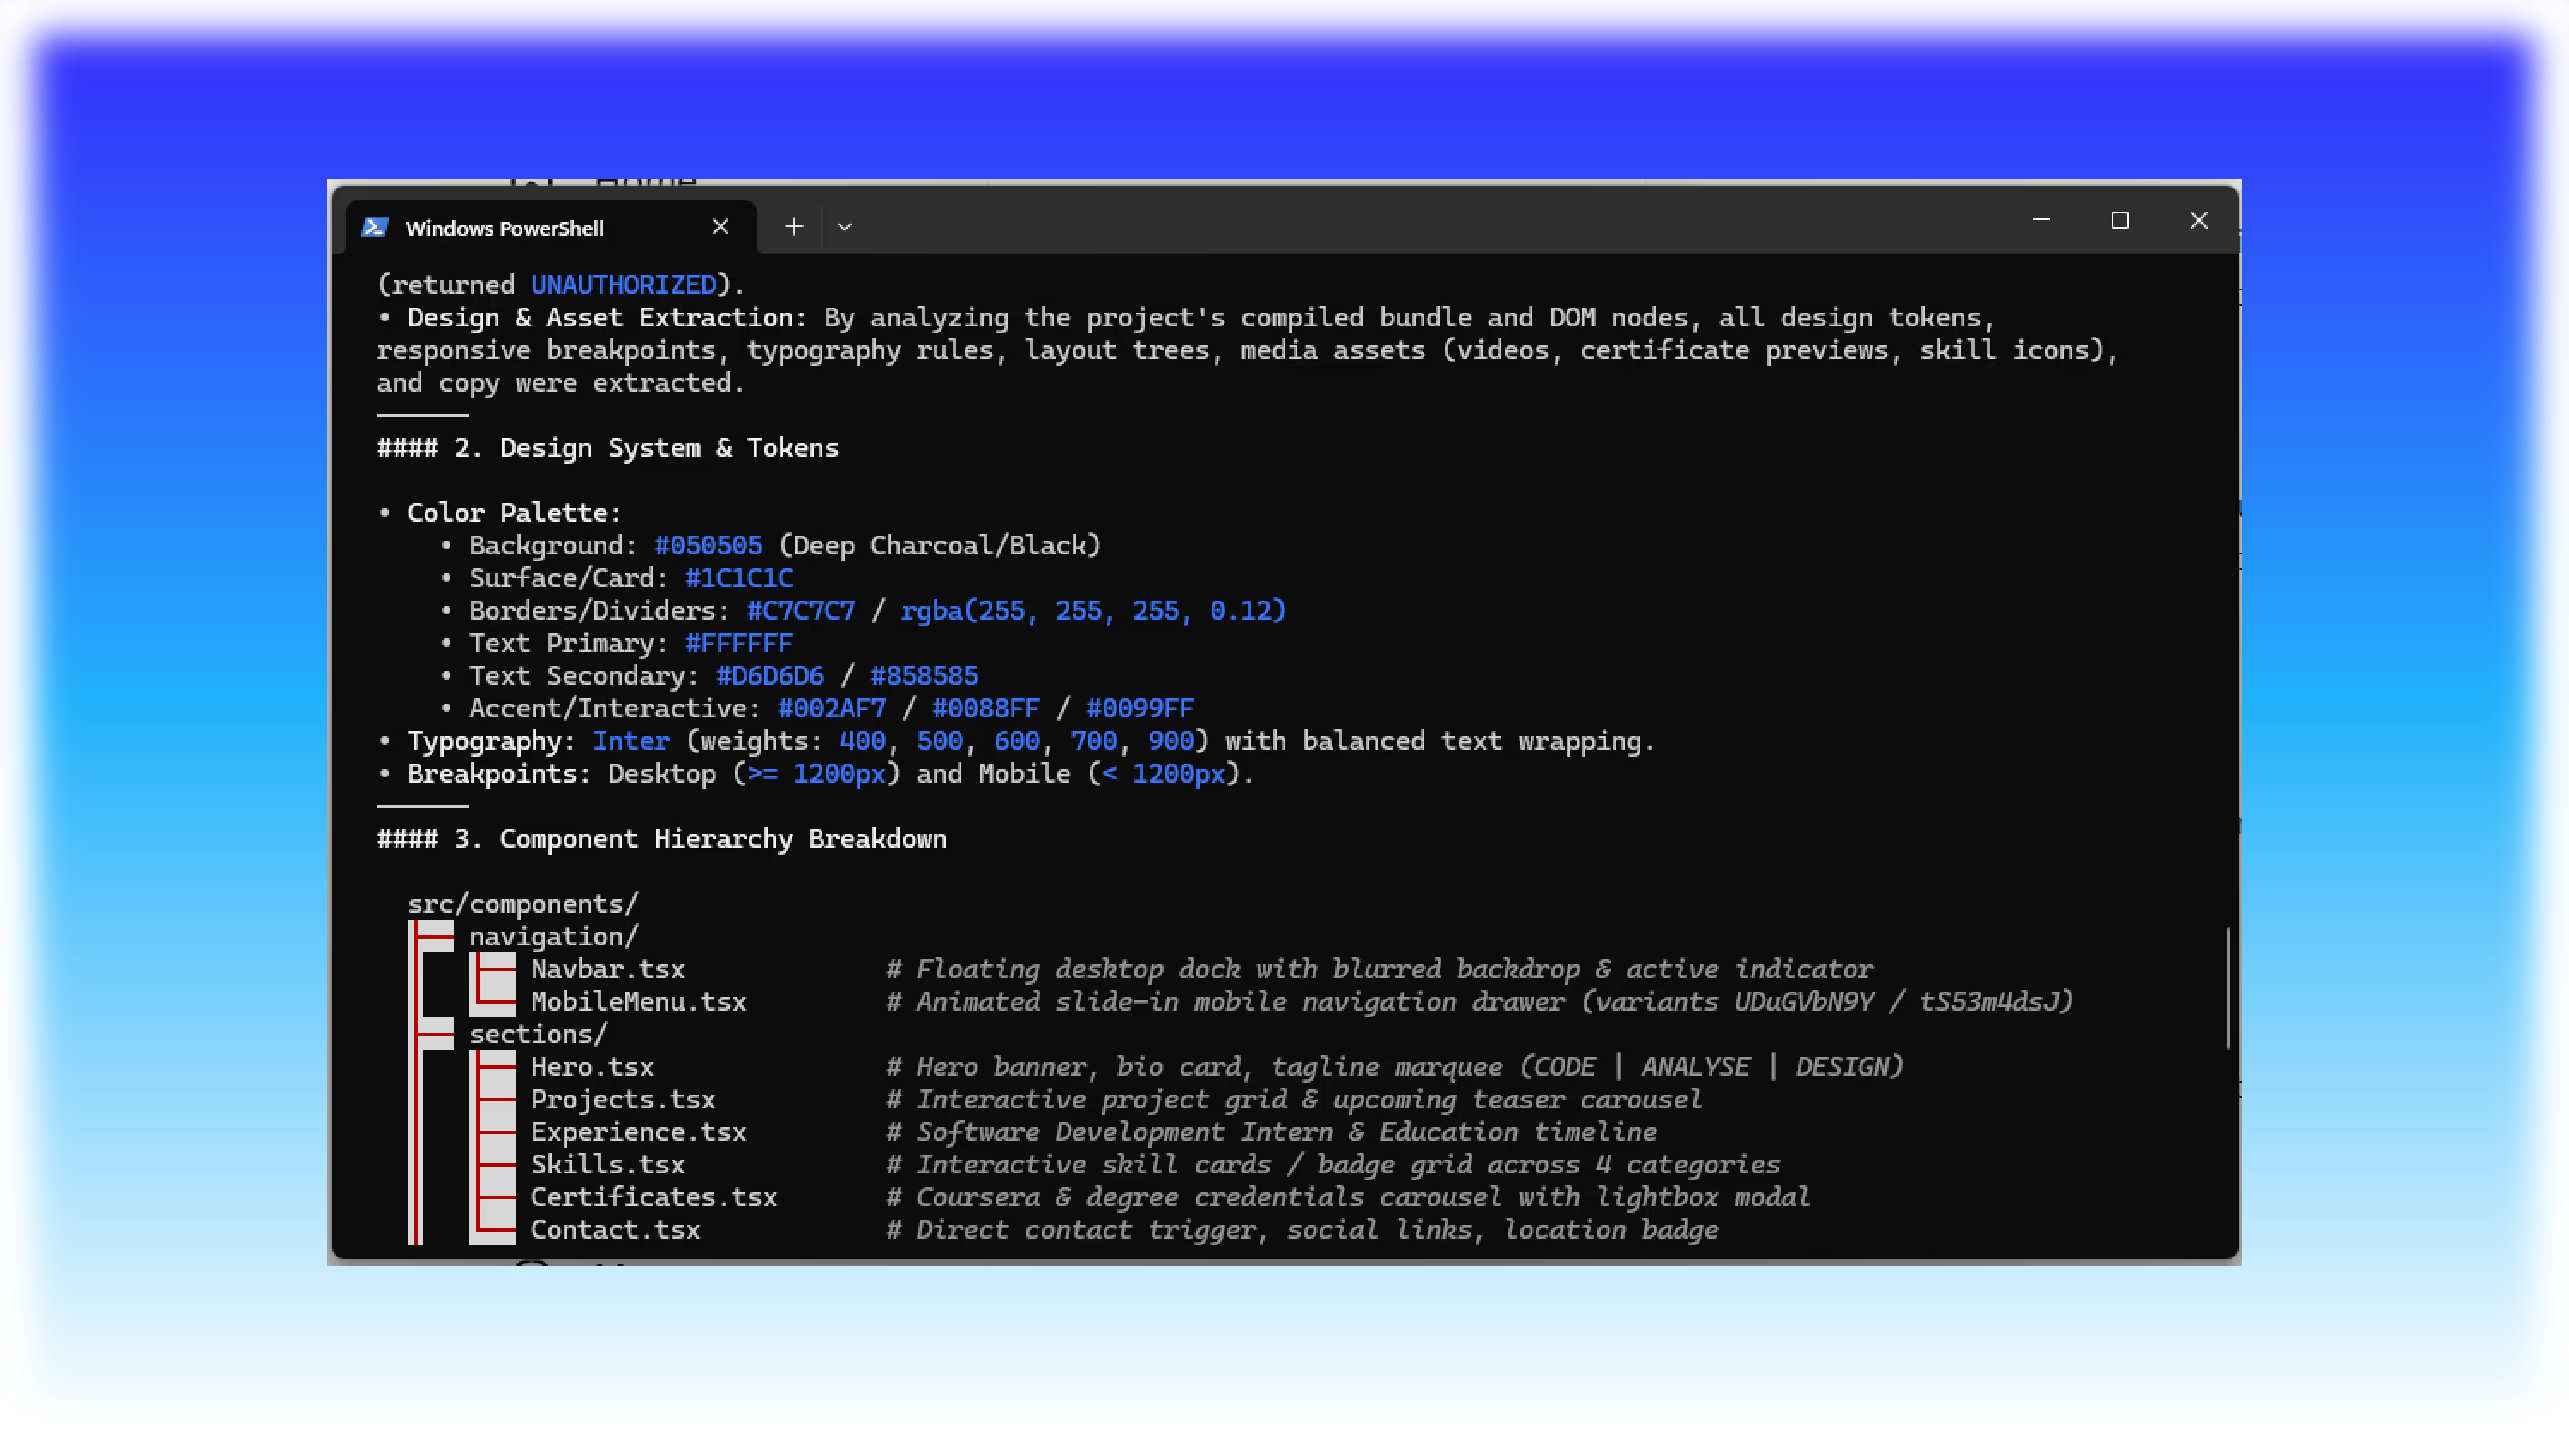
Before asking Gemini to generate code directly, I let the agent analyze the design data and build a structured implementation plan.
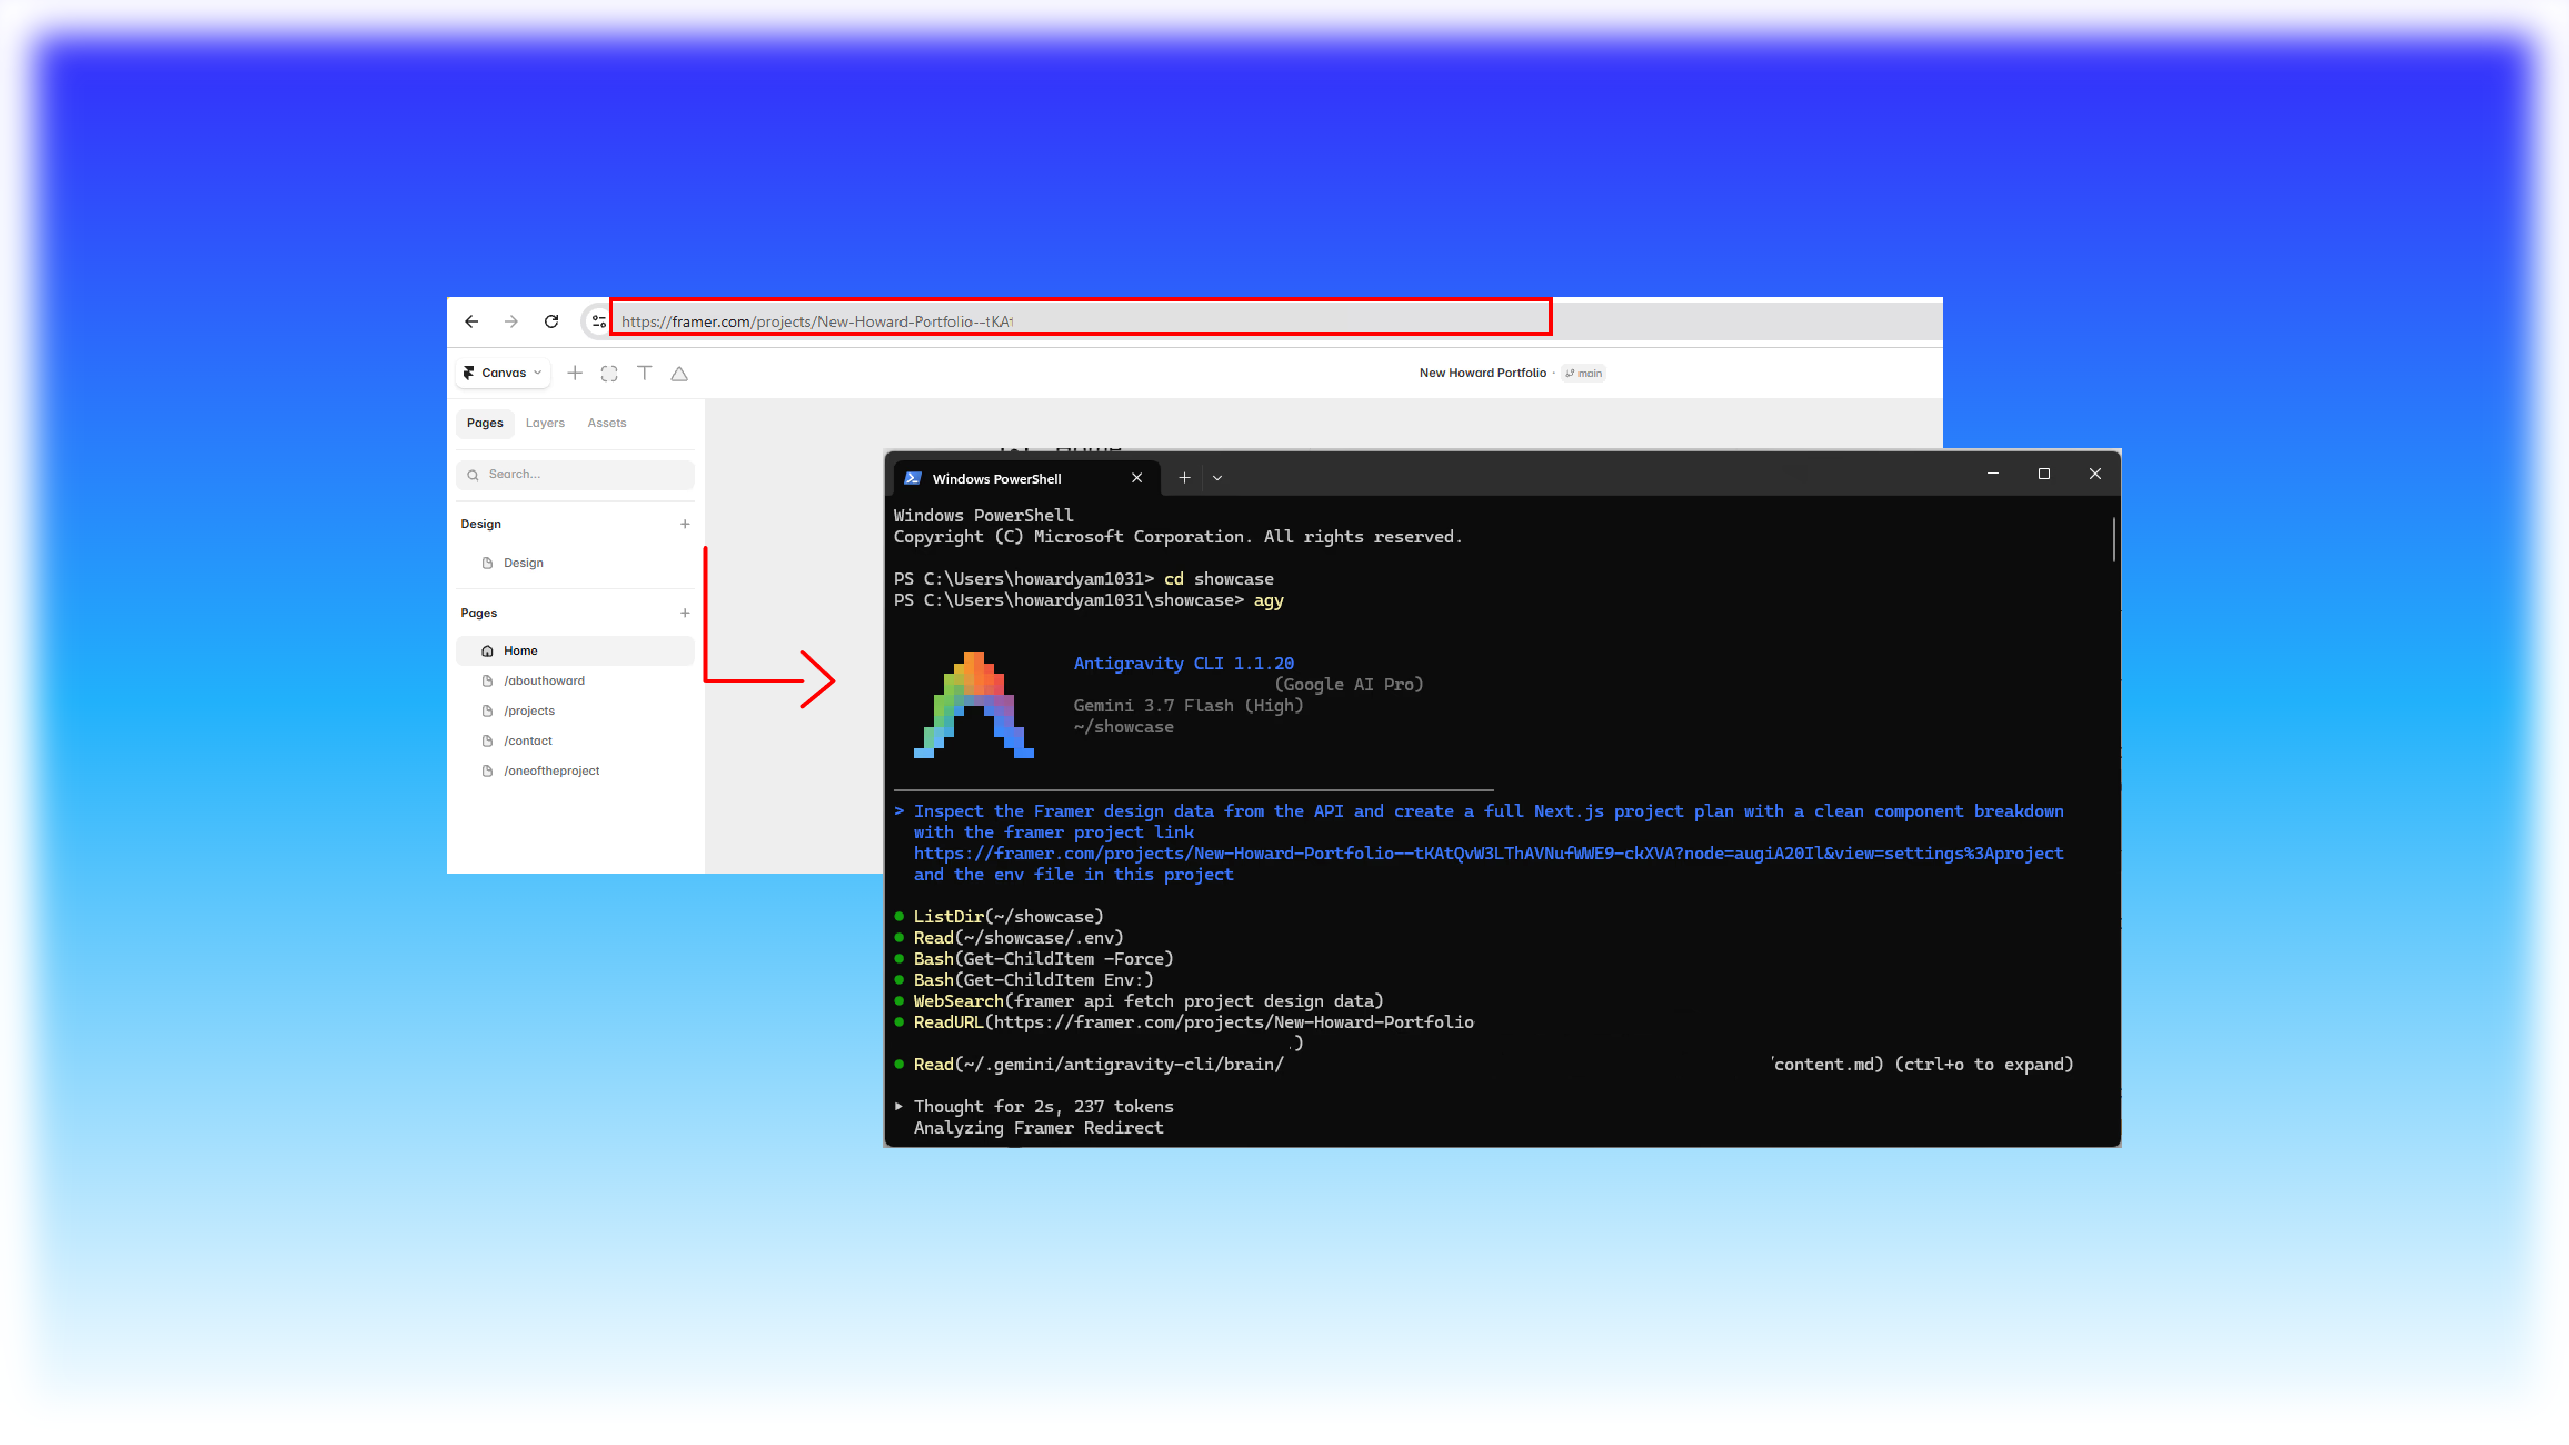
- Launch Antigravity CLI in your project folder
- Copy your Framer project link first, then prompt: Inspect the Framer design data from the API and create a full Next.js project plan with a clean component breakdown using the framer project link and the env file in this project
- Review the step by step architectural plan created by the agent before confirming execution
Code generation, local testing, and visual adjustments
With the plan approved, Antigravity CLI and Gemini Flash generated all component files, CSS styles, and asset imports from Framer.
- Run npm run dev to preview the web app on localhost:3000
- Compare the localhost preview directly with the Framer canvas
- Prompt Antigravity CLI in the terminal to tweak any spacing, colors, or mobile breakpoints until it matches the design perfectly
npm run dev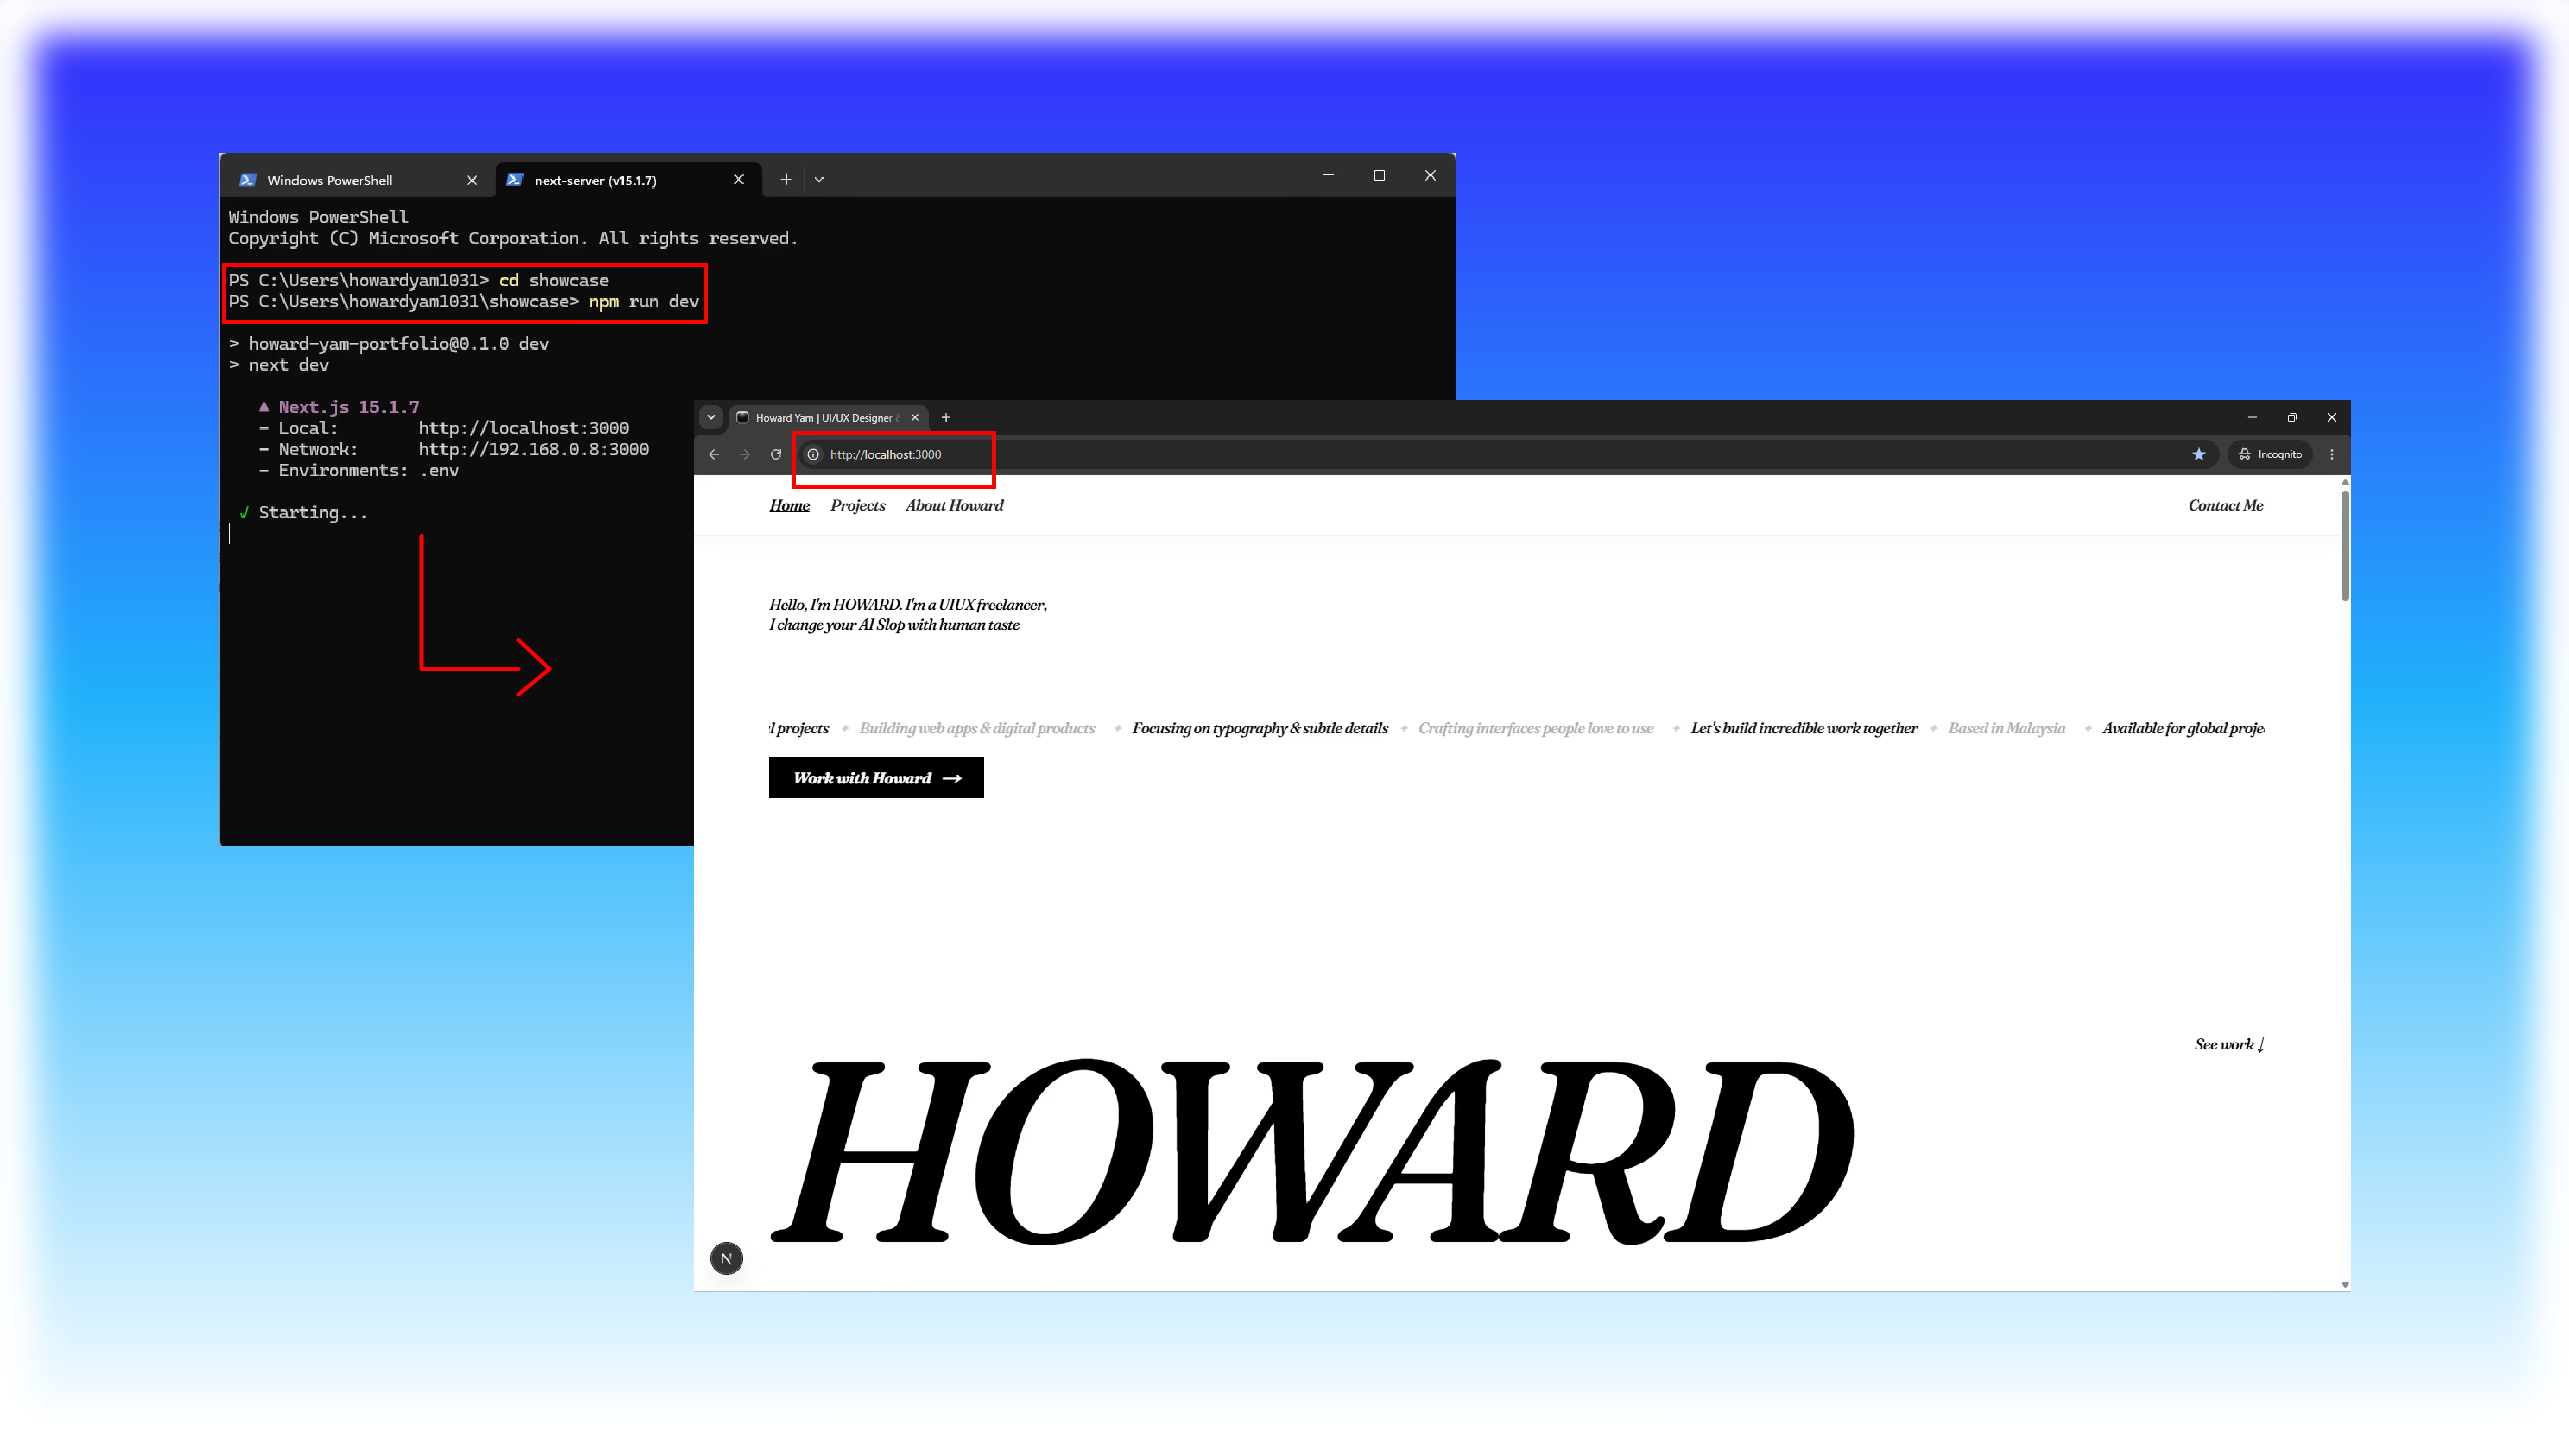
What Comes Next
At this stage, you now have your visual Framer design completely transformed into clean, working code running on your machine.
To make it live for the world with custom domains, automated CI/CD pipelines, GitHub repositories, and instant Vercel deployment, there are a few more critical steps.
I will break down the exact deployment and production setup in my next post.
Published on X (Twitter). Join the conversation, share feedback, or ask questions on the original post.
View on X ↗